Timeline Editor
Create professional videos using the timeline-based video editor
Timeline Editor
The Timeline Editor is MarketDragon's built-in video editing tool. It uses a track-based timeline similar to professional video editors, letting you arrange clips, add audio, and build polished videos.
Opening the Timeline Editor
- Go to Creatives in the sidebar
- Click Create Creative -- a modal slides in
- Select Video and click Continue
- The Timeline Editor opens with an empty project
You can also export compositions from Spaces directly into the Timeline Editor with tracks pre-populated.
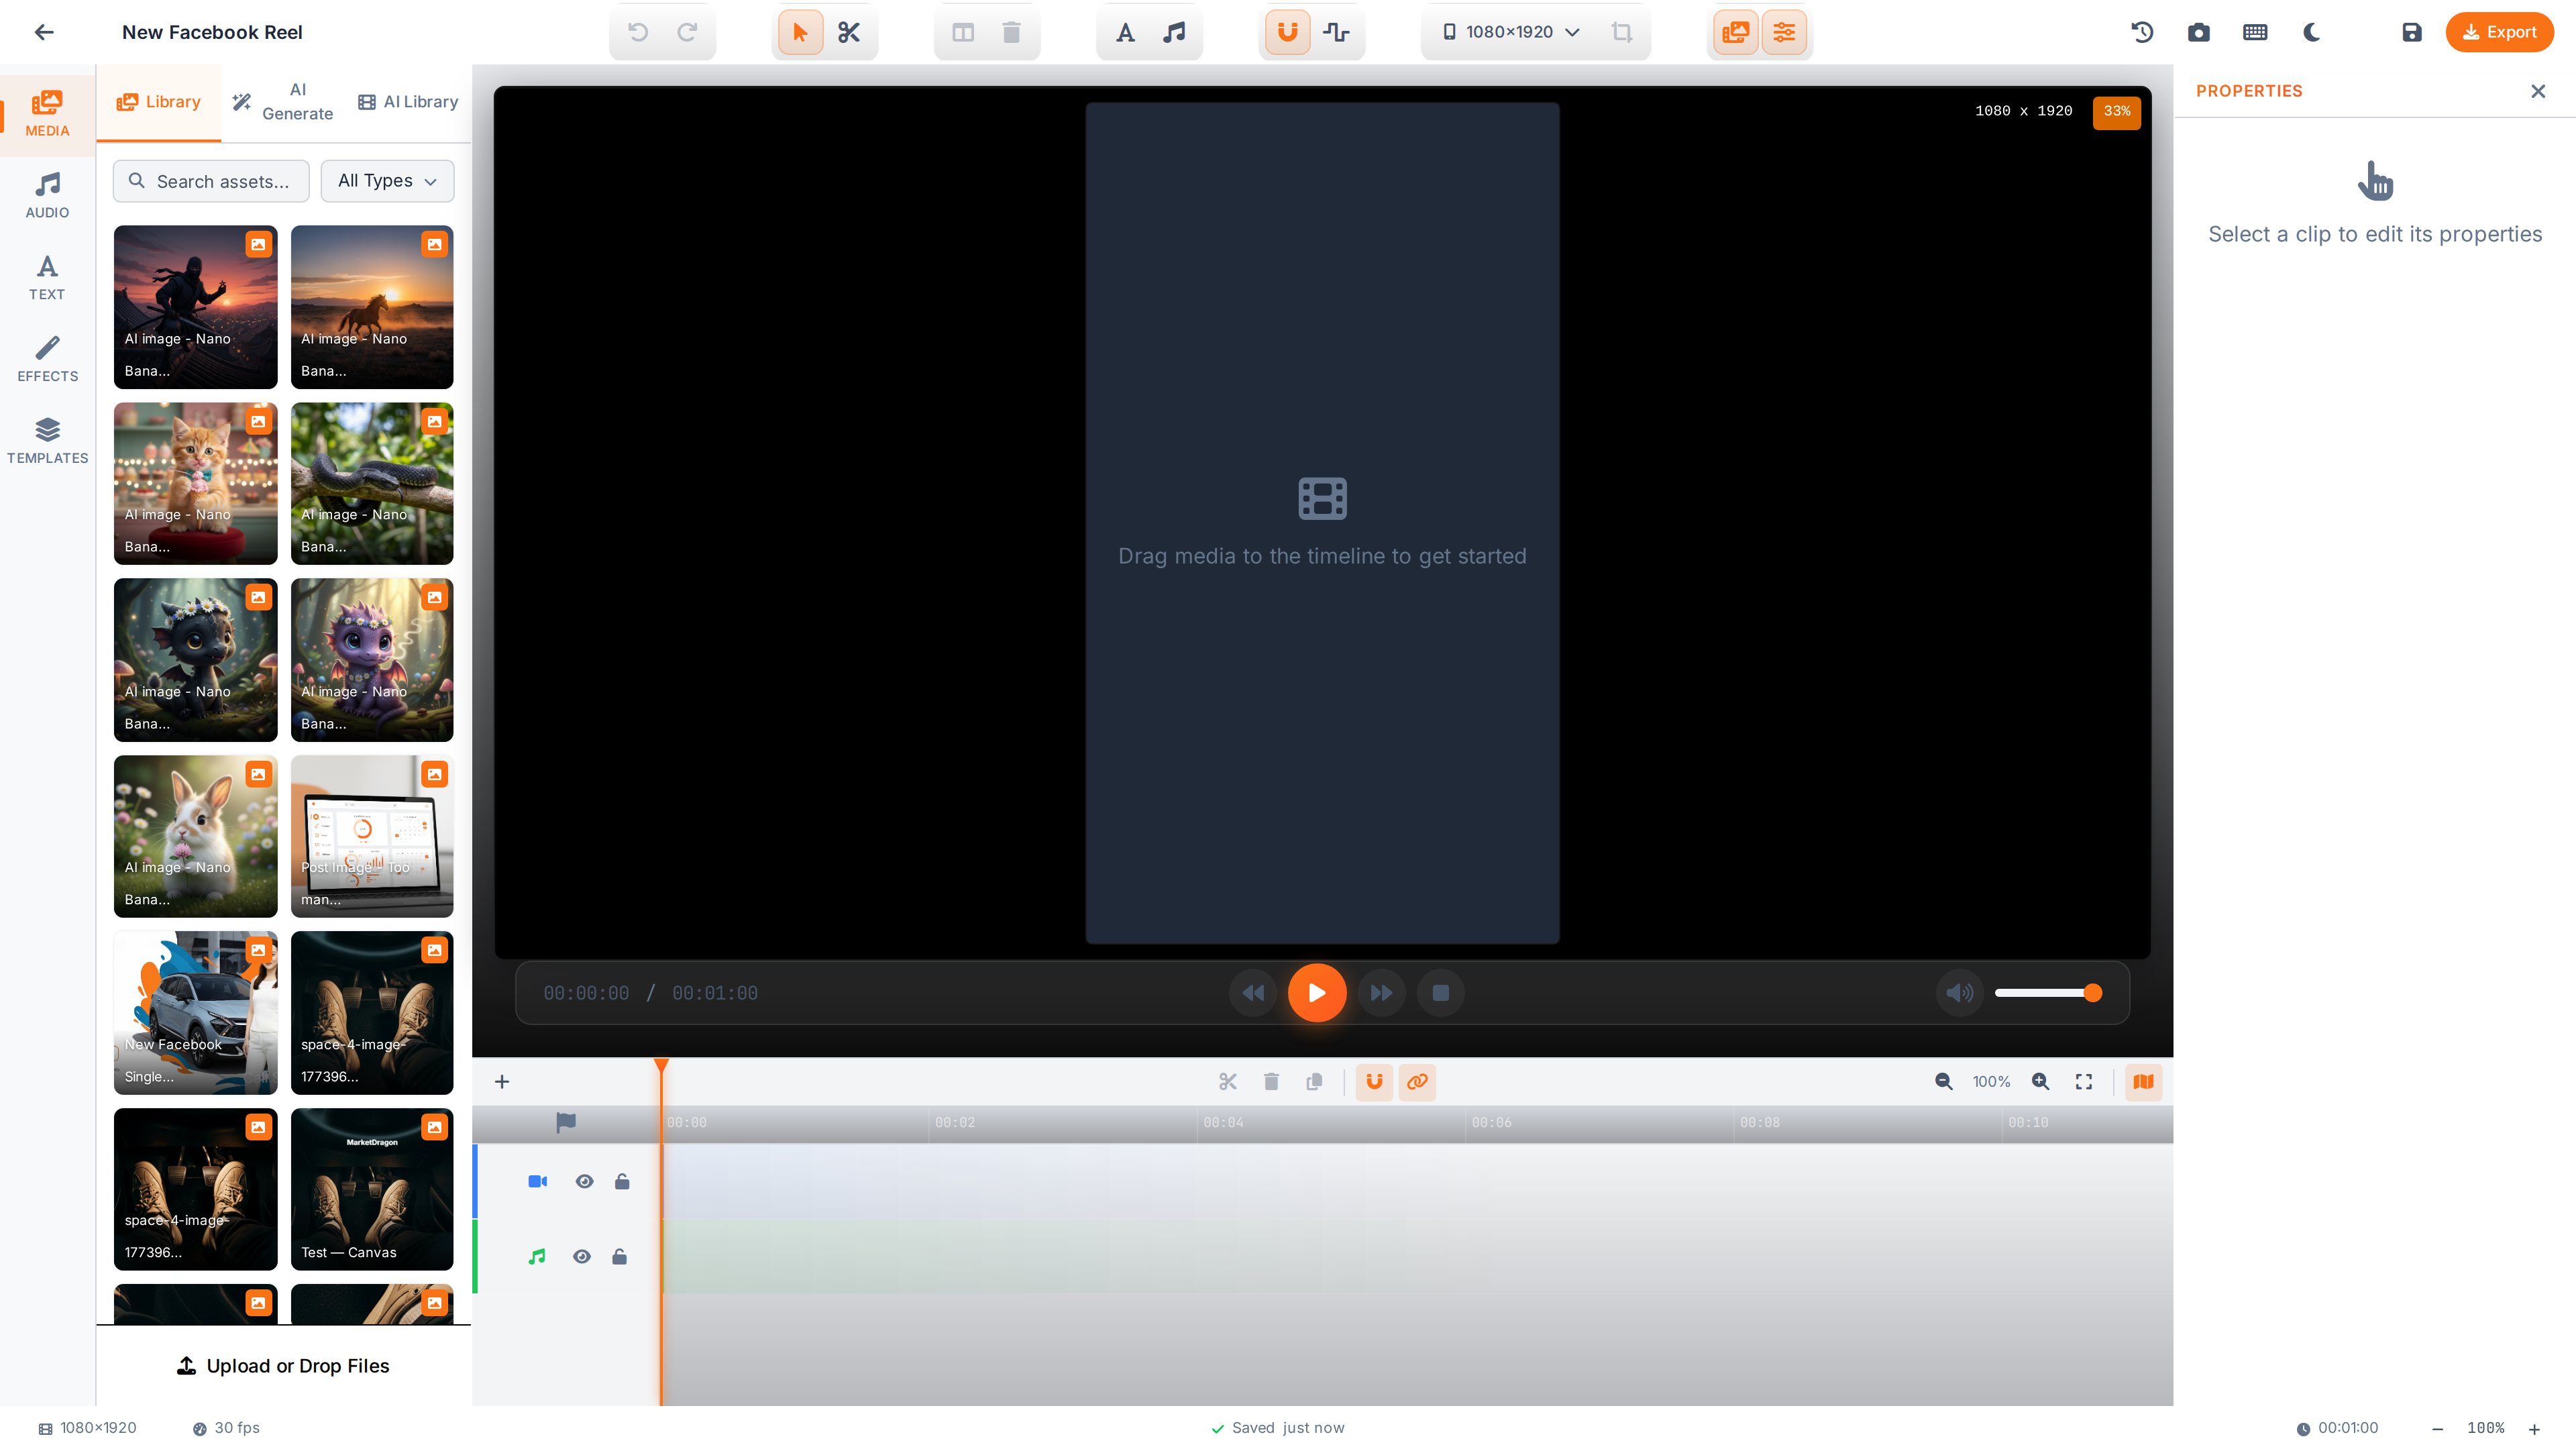
Interface Overview
The editor is divided into three areas:
- Preview Panel (top) -- Shows a real-time preview of your video at the current playhead position
- Track Timeline (bottom) -- Horizontal tracks where you arrange video, audio, and text clips
- Media Panel (left) -- Access your Assets library and add elements
Adding Media to the Timeline
- Open the Media Panel on the left
- Browse your Assets library or upload a new file
- Drag a file onto the appropriate track
- Position it by dragging left or right on the timeline
Working with Tracks
| Track Type | Purpose |
|---|---|
| Video | Video clips and images |
| Audio | Music, voiceover, and sound effects |
| Text | Text overlays and captions |
You can add multiple tracks to layer content. Drag the edges of a clip to trim its start or end point.
Editing Clips
- Split -- Position the playhead and press
Sto split a clip in two - Trim -- Drag the edges of a clip to shorten it
- Delete -- Select a clip and press
Deleteto remove it - Move -- Drag clips to reposition them on the timeline
Transitions and Effects
Click the transition icon between two clips on the same track to add a transition effect (fade, dissolve, slide). Adjust the duration by dragging the transition handle.
Adding Text Overlays
- Click Add Text in the toolbar
- A text element appears on the text track
- Double-click to edit the content
- Use the properties panel to adjust font, size, color, and position
Exporting
- Click Export when your video is ready
- Choose your output resolution and format
- The video renders and is saved to your Creatives library and Assets
Tip: Start with short videos (15-30 seconds) for social media. You can always create longer cuts later.
Next Steps
Video tutorial coming soon
A video walkthrough for this tutorial is being produced. Switch to Read mode for the full written guide.